GEO E-INVOICE at a Glance:
- You can generate, print and email e invoice from Odoo.
- You Can Generate, Print and email specific invoices also.
- To Generate invoice fields are available for required details.
- You can also cancel the invoice.
- We pass all the values to the GST portal.
- Whatever GST portal returns, we maintain log-in chatter.
- We print on default PDF of Odoo Invoice.
For more information you can refer to this video.
We Ensure you WIN and Manage Well

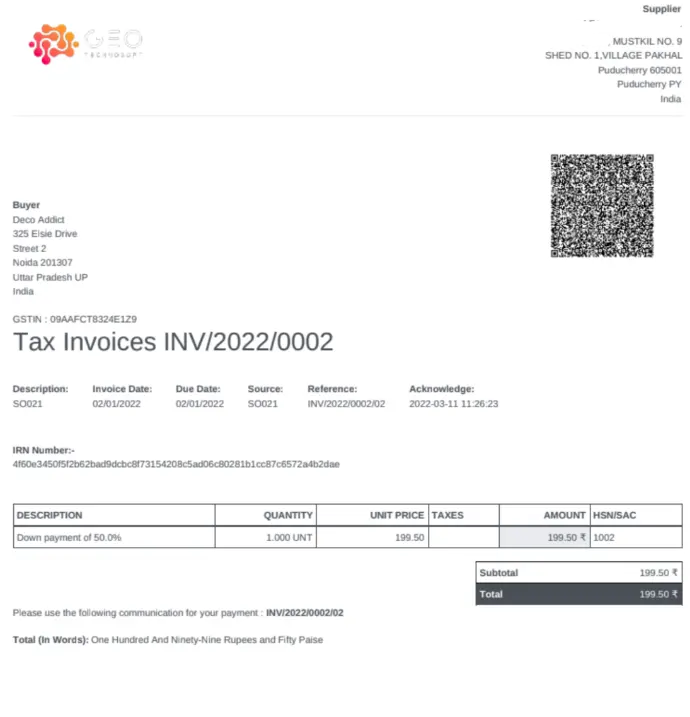
The E-invoice PDF will look like this.
Features Of E invoice
Single-click invoice.
Append all information related to E-INVOICE in Odoo default invoice pdf.
- You can cancel E-INVOICE too.
- This Module will support multi-company Features.
- Our module will not disturb the default Odoo functionality.
- Our module will work with Odoo Enterprise as well as Community.
- Cost-effective solution - One-time module cost tax pro API cost is not even 50 paise for a single invoice.
Screenshots
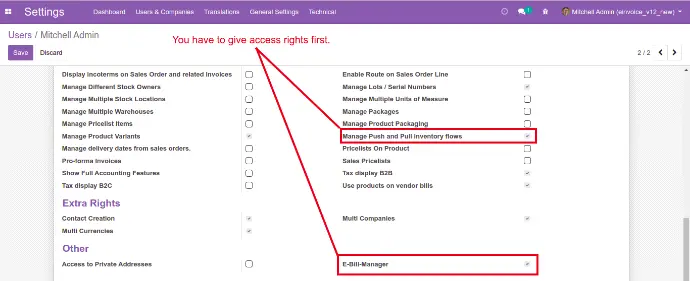
First you have to give access rights.
Go to setting-User-Other
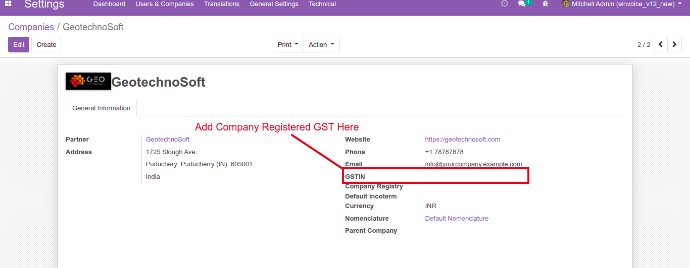
Now you have to go to the company and add company GST no verified by the TAX PRO
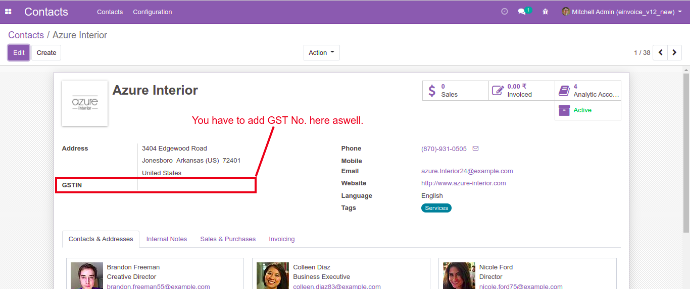
Now we will add GST NO in contacts.
Select the customer and add GST NO in that field.
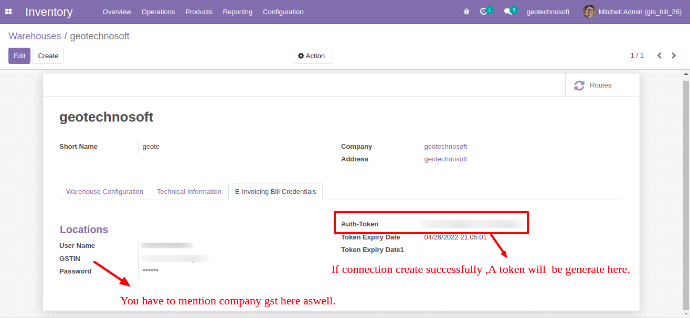
Now we will configure the E-INVOICE in the warehouse.
Inventory=> Configuration =>Warehouse
First, you have to add a username.
After that add password and GST NO.

Now we will configure the E-INVOICE in accounting.
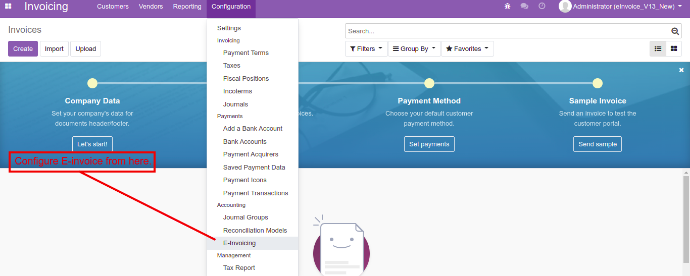
After clicking on this menu a form view will be open.
Here you have to give url type
You have to give ASPID
you have to give a password as well.
Here you have to give url type
You have to give ASPID
you have to give a password as well.
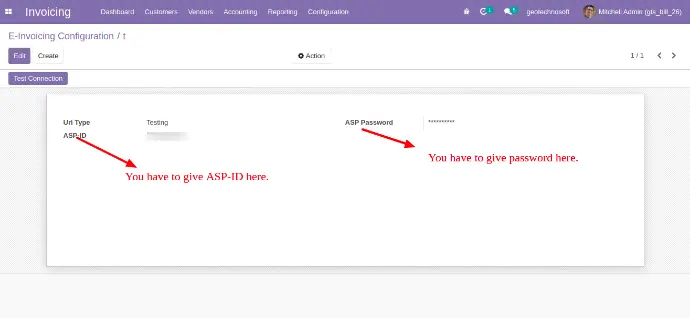
After filling all credentials You have to click on this test connection button, it will create a connection with API.
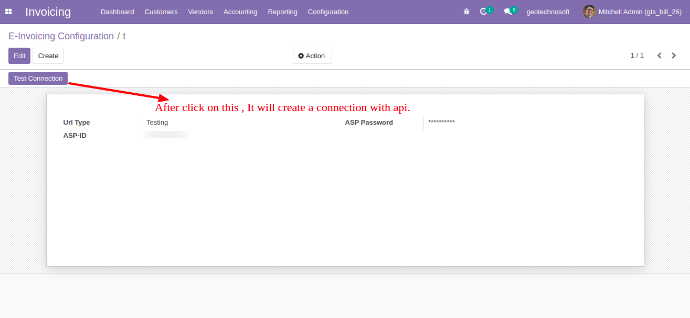
If test connection will be successful than a token will be generated here .
Now we will go in accounting. Customer => Invoice => Click on Generate -E-invoice button
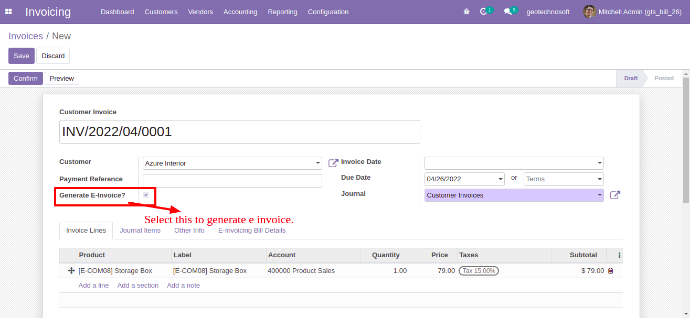
Now we will go in accounting. Customer => Invoice => Click on Generate -E-invoice button

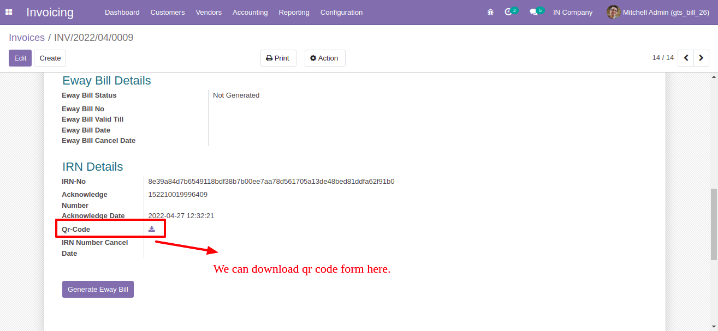
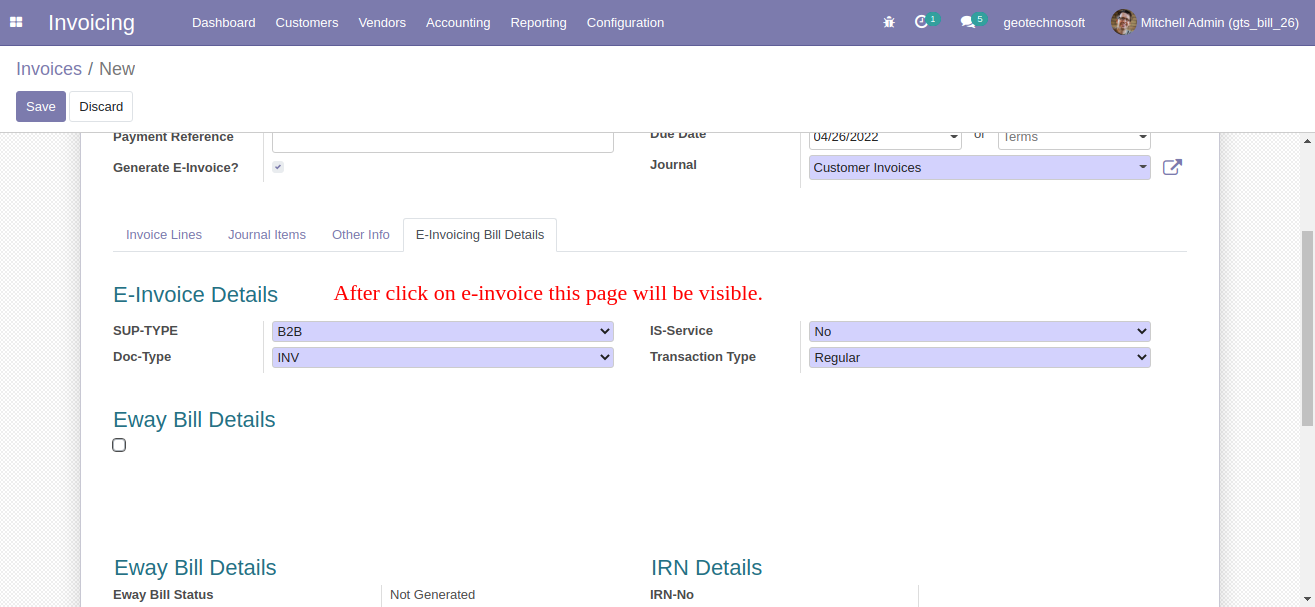
After clicking on that button A tab will appear with the name of the E-invoice bill detailWe have to fill details in all fields.
We have to fill details in all fields.
After generating the E-invoice a QR code will be generated which you can download from here.